Showing posts with label textile methods. Show all posts

Friday, March 16, 2012

Embroidery


Had to pause developing my collection for a couple of weeks as I'm full on working on different kind of project involving my another favorite technique - embroidery. This time I'm making and embroider the bodice of what's going be a wedding dress (Yepp, black with multicolored embellishment - is in fact a wedding dress :)) for a client of the brand I work for - Romance was Born. I'm using plastic raffia as main material for this project with addition of some traditional embroidery threads like wool, cottons and ribbons.


Have been working on it for over 30 hours so far and much more to go, but I'm getting there ;)

Will keep you posted ;) xoxo SheverDUSHKA

Wednesday, June 22, 2011

Textile experiments_Shibori & Felt_2

Done some more bits and pieces trying to find the right direction I would like my "soft jewelry" collection to develop. Not happy yet, but see some promising ideas coming out of it ;))) But I guess will have to finalise them after I come back from my trip. Being kind of busy much recently )))


xoxo SheverDUSHKA

Friday, June 17, 2011

Sheverdushka comes to Russia

Such a beautiful sunny winter day here Down Under )))
Which is itself a great reason to feel good.
Besides I just received feedback saying that both of my workshops (master-classes) I'm going to conduct during my time in Russia (in August) are almost full in just one day. Wow! I'm so impressed and flattered! Thank you so much everyone! So looking forward to meet fellow felters!

Here's the link

Oh, ye, haven't I mentioned that I'm escaping Oz for 2 months in August - September and going for extensive trip to Europe & Russia. So exited!!! Haven't been home for 3 years :-0

Will keep you posted ;)))

xoxo SheverDUSHKA

Tuesday, June 14, 2011

Textile experiments_Shibori & Felt

G'day, everyone!

Recently I've been doing some more experimenting with combination of nuno-felting & shibori.

Vest I made for the master-class I was offered to conduct soon (fingers crossed)


Developing mini-collection of accessories/jewelry
Halloween Story_Onion Necklace


Not sure wat to do with this piec yet... May be turn it into pillow cover )))


Organza(left sample) and dyed in indigo piece of cotton voile (right sample) are felted and then "shibored" applying "mokume" method


Piece of silk chiffon was dyed in indigo utilising block/resist dyeing technique and then felted on

Saturday, June 5, 2010

Nuno felting. Technical tips.

There are some technical hidden stones I have learnt experimenting with nuno-felting:

Shrinkage

- Although averagely during "hardening" process piece of felt shrinks by 30% (if to spin in washing machine at 800+ speed can potentially shrink to 50% (by the way, help to dry felt much quicker too(!))) in case with nuno-felting it depends on what kind of fabrication is used as to incorporate it with. For example, stiff (but comparatively loose woven cottons) will prevent felt from shrinking to much.
- If you using resist to separate two layers of felt then depending on the way its applied it also can prevent felt from shrinkage. For instance, if nuno-felt is wrapped around to create seamless tube then expect to appear much more shrinkage at sides that are not wrapped (about average 30%) and much less (maximum 10-15%) on wrapped ones, especially if resist material is quite strong.

Suitable fabrication for nuno-felting

- Variable sort of wools including jersey works with felt beautifully;
- Most of silks (especially organza and chiffon) except taffeta (or dupion) and use satin densely woven versions;
- Some cottons, loosely woven;
- Cotton/silk or silk/viscose mixes, but once again, comparatively loosely woven;
- Some synthetics, such as poly or nylon organza, but take into consideration that to make them work with felt will require more rolling.

Monday, April 26, 2010

Technologies. Nuno felting.


My collection will be heavily based on such textile technique as felting and particularly its advanced version - "nuno felting". There is some introduction of that unique textile creation method.

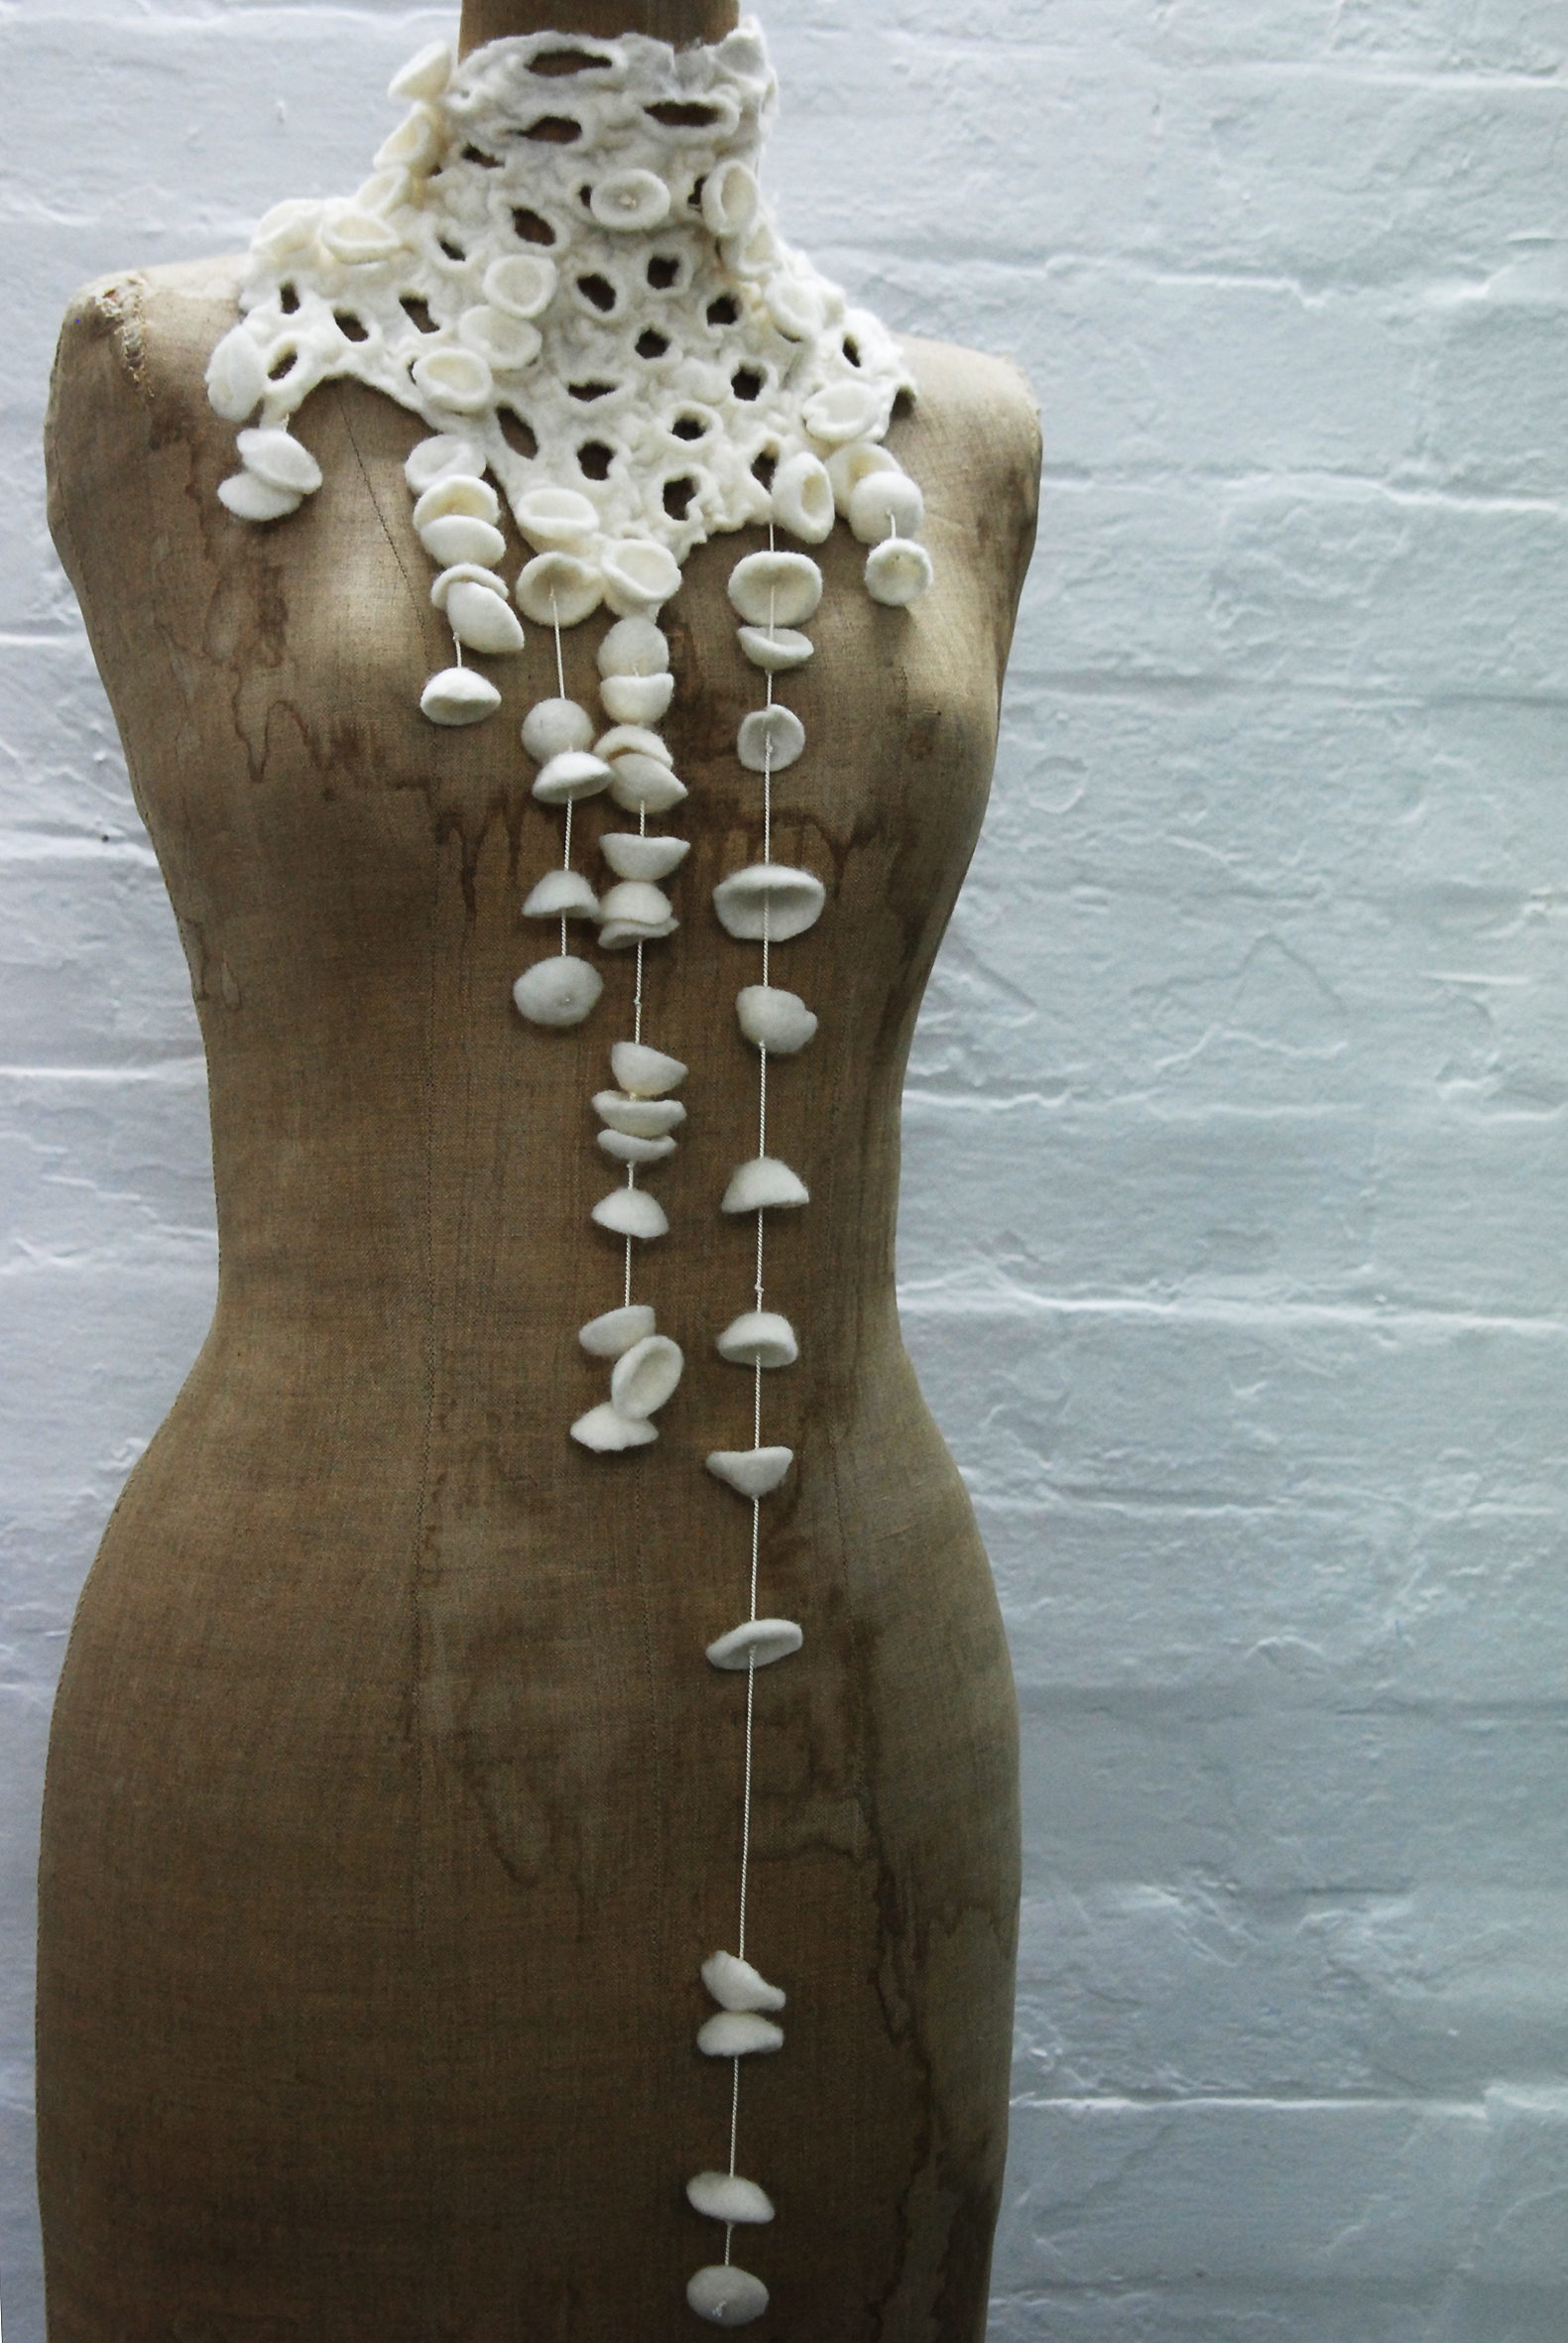
"Felting" (which is thought to have originated in Asia) is one of the oldest textile processes and was used for hats, wall coverings, boots, blankets and the covering of yurts. Fibres, usually wool or other forms of animal fleece or hair, are manipulated to form a densely interlaced mass which can then be flattened, moulded or otherwise shaped. Felting is an efficient form of insulation.

"Nuno" means fabric in Japanese. Nuno felting is a process which melds loose fibre, usually wool, into a sheer fabric such as silk gauze. This creates a lightweight felt that can totally cover the background fabric or be used as a single decorative design. The Nuno felting process is particularly suitable for fine garment making, since silk-backed felt ensures a stable felt that will not stretch out of shape like normal felt. Because it is lightweight and easy to manipulate it can also be dyed more readily than traditional felt. Other fabrics or open weaves can be used as the felting background, resulting in a wide range of textural effects and colours.

NUNO FELTING BASICS


Step 1 Lengths of hand dyed silk gauze were arranged on a long table which was covered with a cut piece of a swimming pool cover. Traditional see-through bubble wrap can be substituted. Next, thin bits of hand-dyed wool woven were arranged onto the gauze. Due to time constraints, we 'decorated' only the ends of our scarves.

Step 2 These layers were covered with a thin, almost sheer, nylon material. Having several hands helped to keep the roving from being disturbed as it was positioned. Next, cool water was worked into the layers.

Step 3 A bar of soap, fitted into a nylon sleeve was rubbed over the material.....along with more water until everything was fully saturated.

Step 4 The layers were carefully rolled up and tied tightly with strips of nylon (panty hose worked great for this task). Now the hard work began. Using the pressure of hand and arms, this 'log' was rolled back and forth on the table....for what seemed like hours....but was probably only 20 mins. This friction begins the process of matting the layers together so the fibers can work their way into the gauze.

Step 5 About every 50-100 rolls of the 'log', it was unrolled and checked for signs that it was beginning to felt. Until the fibers stick to the gauze (when they can no long be picked up between a finger and thumb), the rolling continues. Once it does, it's unrolled and more agitation on just the scarf is required. This again means the addition of soap and water and lots of picking up of the material and slapping it down onto the table. This where it can get messy.

The work is finished when the gauze has shrunk up and gotten distorted as the wool fibers have penetrated the material, becoming one.

image from